 About the Pledges Page
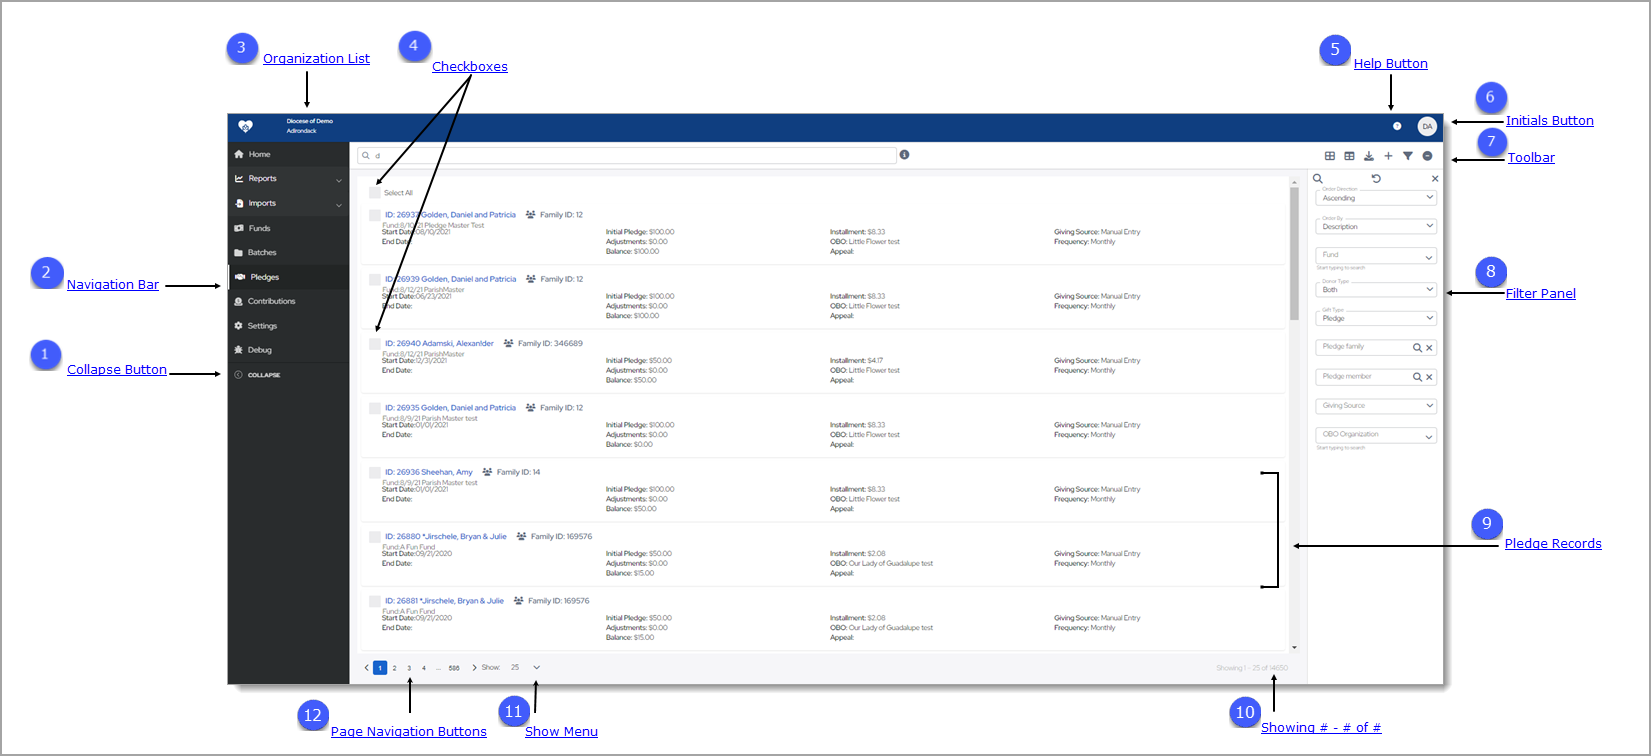
The Pledges page displays a list of pledge records associated with the logged-in user's organization. Additionally, the pledges listed are only those for the funds that the logged-in user has permission to access.
![]() Click the arrowhead next to an option to expand it and view its description.
Click the arrowhead next to an option to expand it and view its description.
To access the Pledges page, you must either have Organization Admin access rights tied to your login or Offering > View permissions. Access rights and permissions are granted to individual users in their staff records, accessed through the Manage Staff page in the Administration module. You must have Organization Admin rights to view the page and assign permissions. For details, see the online Help for the ParishSOFT Administration module.
What Is a Pledge?What Is a Pledge?
A pledge is a giver's promise to make a donation to a fund. A pledge can be paid with a single payment (one-time gift) or multiple payments (installments) that are spread out over a period of time until the commitment is fulfilled.
What Is a Pledge Record?What Is a Pledge Record?
A pledge record contains information associated with the specific pledge. You can view pertinent details, such as the name of the giver and the fund to which the pledge is made; the pledge schedule; the amount of the initial pledge and the amount outstanding; and the payment frequency.
Overview of the Pledges Page
The illustration below identifies the main elements on the Pledges page. In the illustration, click a numbered link to view an element's description.
![]() When you first open the Pledges page, no records are displayed. To find a specific pledge record, use the Search or
Filter feature.
When you first open the Pledges page, no records are displayed. To find a specific pledge record, use the Search or
Filter feature.
 Collapse Button
By default, the Navigation Bar is expanded, so the entire name of each page is visible. If you need more viewing space in the right panel, you can collapse the menu by clicking  . Doing so minimizes the
menu so that only the page icons are visible:
. Doing so minimizes the
menu so that only the page icons are visible:

To return the Navigation Bar back to the expanded position, click  (Expand). Note that the state (expanded or minimized) of the menu that you specify on any page stays the same
on all pages until you change it.
(Expand). Note that the state (expanded or minimized) of the menu that you specify on any page stays the same
on all pages until you change it.
 Navigation Bar
The Navigation Bar is the menu that sits on left side of the Pledges page (and on every other page in the module). The menu lists the module's primary pages and provides a way for you to quickly move from one page to another. When you want to view a specific page's content, simply select the page option.
 Organization List
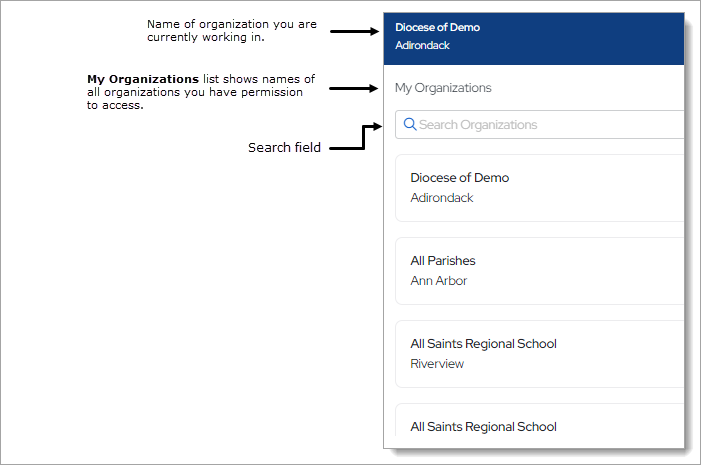
The Organization list is located above the Navigation Bar. By default, this dropdown list is closed and shows the name of the organization you are working in.
- If you have access to one organization, the list displays the name of your organization. The dropdown functionality is disabled because you have limited access.
- If you have access to multiple organizations, the list displays the name of the organization you are working on or last worked in. Select the organization’s name to display a list of all the organizations you have permission to access. If the list is long, you can either type the organization’s name into the Search Organizations field (see illustration below) or use your mouse to scroll through the list to find the organization you want and then select it.
 Selection Checkboxes
When managing pledge records in the grid, you will find it handy to be able to select and deselect one or multiple records or even all records in the grid. The Pledges grid features the following checkboxes:
Select All/Select None CheckboxSelect All/Select None Checkbox
This is a global control that lets you select all records on the page at the same time. The system inserts a checkmark in the box next to each record to let you know which records are selected. If you select multiple records and then apply a command
using one of the action buttons in the upper-left (for example, ![]() Export), the command applies to the selected records only.
Export), the command applies to the selected records only.
To deselect all records, select the Select All checkbox again.
![]() You can use this global checkbox when you have a lot of records to select or when most records should be selected. You can then individually deselect the records you do not want to work with.
You can use this global checkbox when you have a lot of records to select or when most records should be selected. You can then individually deselect the records you do not want to work with.
Individual CheckboxesIndividual Checkboxes
You can select individual records by selecting each record's checkbox. You can select as many records as you want. The system inserts a checkmark in the box next to each record to indicate it is selected.
 Help Button
Click  to access the Offering Help. The Help opens in a separate browser so that you can view it while working in the module. The Help provides an
overview of Offering concepts and features and offers step-by-step instructions on how to perform specific Offering tasks.
to access the Offering Help. The Help opens in a separate browser so that you can view it while working in the module. The Help provides an
overview of Offering concepts and features and offers step-by-step instructions on how to perform specific Offering tasks.
 Initials Button
This button shows the initials of the logged-in user. Clicking the button display the Log Out option. Click this option to log out of Offering.

 Toolbar
The Pledges toolbar, shown below, spans across the top of the page. The toolbar includes a Search box and a group of buttons that give you quick access to the functions you use most often on the Pledges page.

Search Feature
The Search feature provides a quick and easy way for you to find pledges without having to look through an entire list, which, depending on the number of pledges you have, can be pages long. Note that when you conduct a search, only the pledges associated with funds you have permission to access are displayed in the search results.
![]() Information Icon
Information Icon![]() Information Icon
Information Icon
The information icon ![]() is situated to the right of the Search box. Place your mouse on the icon (without clicking) to see what type of information you can search for using the Search box.
is situated to the right of the Search box. Place your mouse on the icon (without clicking) to see what type of information you can search for using the Search box.
Using the Search BoxUsing the Search Box
You can search for a single pledge by typing the Pledge ID, Family ID, Member ID, Family Name, or Member Last Name into the Search box. You can type the full name or ID or a just few characters of the name or ID into the
box. Then, click ![]() to start the search. The list refreshes to show you the names of pledges matching your search criteria.
to start the search. The list refreshes to show you the names of pledges matching your search criteria.
For example, to find a pledge for Madge McClintock, you could enter any of the following search criteria: "Madge", "mcc", or "tock", to name a few.
Clearing the Search BoxClearing the Search Box
To clear the search box, select the search criteria currently showing in the box, and then press the Delete key on your keyboard.
Toolbar Buttons
Next to the button, click the arrowhead to expand it and view its description.
On the right side of the toolbar, two buttons let you change the layout view. Each view has advantages and disadvantages, depending on the device you are using to view your data. Select the view that suits the device, your preference, and style for working.
Click the arrowhead next to an option to expand it and view its description.
![]() Card View (default)
Card View (default)![]() Card View (default)
Card View (default)
The default layout for pledge records is called the Card View. This layout arranges pledge records in separate containers that resemble index cards. Each card occupies a single row that spans across the page and contains one record. The card gives you an at-a-glance summary of key information in the record.
To enable card view layout, click ![]() .
.
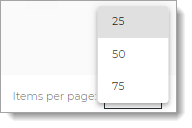
Use the Items per page dropdown list at the bottom of the page to select the number of cards to display per page:
The Grid View layout arranges pledge records in the form of a table with each record occupying a row. Columns across the top identify the fields in the record (for example, Member ID and Initial Pledge).
Use the Items per page dropdown list at the bottom of the page to select the number of cards to display per page:
Click ![]() to generate a Pledge List report (Excel or PDF). This report lists all of the pledges in your organization that match your filter criteria.
to generate a Pledge List report (Excel or PDF). This report lists all of the pledges in your organization that match your filter criteria.
Click .png) Add New Pledge to open the Pledge Details page where you can add a new pledge record. To view explanations of the fields in the fund record,
go to Pledge Record Details.
Add New Pledge to open the Pledge Details page where you can add a new pledge record. To view explanations of the fields in the fund record,
go to Pledge Record Details.
The filter button ![]() opens and closes the Filters panel. This panel contains filters that you can apply to the Pledges list to find pledge records that meet a specific criteria. For more information on the
Filters panel, go to
opens and closes the Filters panel. This panel contains filters that you can apply to the Pledges list to find pledge records that meet a specific criteria. For more information on the
Filters panel, go to
![]() You can also click
You can also click  to close the Filter panel.
![]() With the exception of the Fund filter setting, the system autosaves your filter and sort settings for the Pledges list and retains
them as your personal defaults. Even after you log out, the settings remain the same until you change them. Be aware that your settings are saved on your local device, so if you log in using a different computer, you may see different settings.
With the exception of the Fund filter setting, the system autosaves your filter and sort settings for the Pledges list and retains
them as your personal defaults. Even after you log out, the settings remain the same until you change them. Be aware that your settings are saved on your local device, so if you log in using a different computer, you may see different settings.
Click ![]()
![]() to delete selected pledges from the
grid.
to delete selected pledges from the
grid.
 Filter Panel
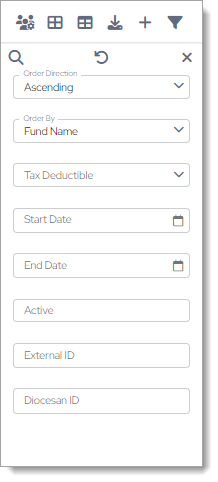
The Filter panel contains filters you can use to narrow down and sort your search results. The Filter ![]() button in the toolbar opens and closes this panel.
button in the toolbar opens and closes this panel.
Filter Panel Buttons
These buttons are located at the top of the Filter panel:
![]() (Search): enter or select your filter criteria in the Filter panel fields, and then click
(Search): enter or select your filter criteria in the Filter panel fields, and then click ![]() to find matching pledges.
to find matching pledges.
![]() (Clear Search): clears the currently selected criteria from all filters in the Filter panel.
(Clear Search): clears the currently selected criteria from all filters in the Filter panel.
![]() (Close Search): closes the Filter panel.
(Close Search): closes the Filter panel.
Filter Descriptions
The filters in the panel are listed below. Click the filter's name to view its description.
Order DirectionOrder Direction
Specify the sort order in which to display your results:
- Ascending: sorts alphabetic content from A to Z and numeric content from 0 to 9 (lowest to highest).
- Descending: sorts alphabetic content from A to A and numeric content from 9 to 0 (highest to lowest).
Select the desired field in the pledge record on which to sort results:
- Description: pledge description.
- Pledge ID: unique number that identifies the pledge in your system.
- Start Date: the date the pledge commitment was made or the date the pledge was originally recorded in the system.
- End Date: the date the organization will stop associating contributions to the pledge even if an outstanding balance remains.
- Amount: pledge amount.
This list contains the funds that the logged-in user has permission to access. Select a specific fund to view its pledges or All Funds to view pledges for all funds.
Filters the records to show family pledges, member pledges, or pledges made by both members only, or both families and members.
Filters the records to show pledges by the selected family. Click ![]() to open the Directory Search window. Use the fields to find the family whose
pledges you want to view.
to open the Directory Search window. Use the fields to find the family whose
pledges you want to view.
Filters the records to show pledges by the selected member. Click ![]() to open the Directory Search window. Use the fields to find the member whose
pledges you want to view.
to open the Directory Search window. Use the fields to find the member whose
pledges you want to view.
Filters the records according to how the gift came into the system. For example, Manual Entry, Faith Direct, and Lockbox Import.
Filters the recorrds to show pledges made by registered families only, non-registered families only, or both registered and non-registered families.
Filters the records to show pledges made by families in the selected group. The dropdown list contains the family groups created in your organization.
Envelope NumberEnvelope Number
Lets you search for pledge records by envelope number.
 Pledge Records
Each pledge record in the grid provides the information listed below. Click an item in the list to view its description.
![]() To view all the details in a pledge record, click its Name link.
To view all the details in a pledge record, click its Name link.
ID and Donor Name LinkID and Donor Name Link
Shows the unique number that identifies the pledge in your database and the name of the donor associated with the pledge. Clicking the link opens the donor's pledge record.
The icon shown to the right of the donors name indicates the type of pledge:
 : indicates a pledge made by a family. This type of pledge has both a Family ID and a Member ID associated with it.
 : indicates a pledge made by an individual member. This type of pledge has a Member ID associated with it.
Name of the fund receiving the pledge.
A unique number that identifies the family in your database.
A unique number that identifies the member in your database.
The date of the original pledge commitment or the date the pledge was originally recorded in the system.
The date the organization will stop associating contributions to the pledge even if an outstanding balance remains.
Amount of the original pledge before any contributions or adjustments are made.
Shows the dollar amount of adjustments made after the initial pledge is recorded. Adjustments show as:
- Positive amounts to indicate an increase in the total pledge amount.
- Negative amounts to indicate a decrease in the total pledge amount.
Amount remaining to be paid toward the pledge.
Payment frequency (how often the donor pays installments). For example, monthly and quarterly.
Shows how the pledge came into your system. For example, Manual Entry, Faith Direct, or Lockbox Import.
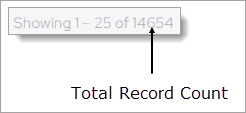
 Showing # - # of #
To the far right, a total count of records in the grid is displayed:
 Show Menu
The Show menu lets you choose the maximum number of records to display per page. The default is set to 25. You can increase the limit to 50 or 75. To do so, click ![]() and then select the number of records you want to view per page.
and then select the number of records you want to view per page.
 Page Navigation Buttons
The page buttons at the bottom of the page help you quickly navigate through the grid.
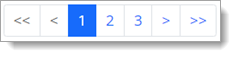
 : takes you directly to the page number. For example, clicking 3 takes you to page 3 in the grid.
 : takes you one page back from the page you are currently viewing.
 : takes you one page forward from the page you are currently view.
 : takes you to the first page of the grid.
 : takes you to the last page of the grid.
Related Topics